Create ISP Program
ISP Programs can be used to track the progress of an individual as they are working on their goals or objectives. An ISP (Individual Support Plan) Program includes the written details of the supports, activities, and resources used to help an individual toward accomplishing their goals.
Users assigned with the ISP Program Submit role can create new ISP Programs.
1. Starting on the Individual Tab, Click on New beside ISP Program.

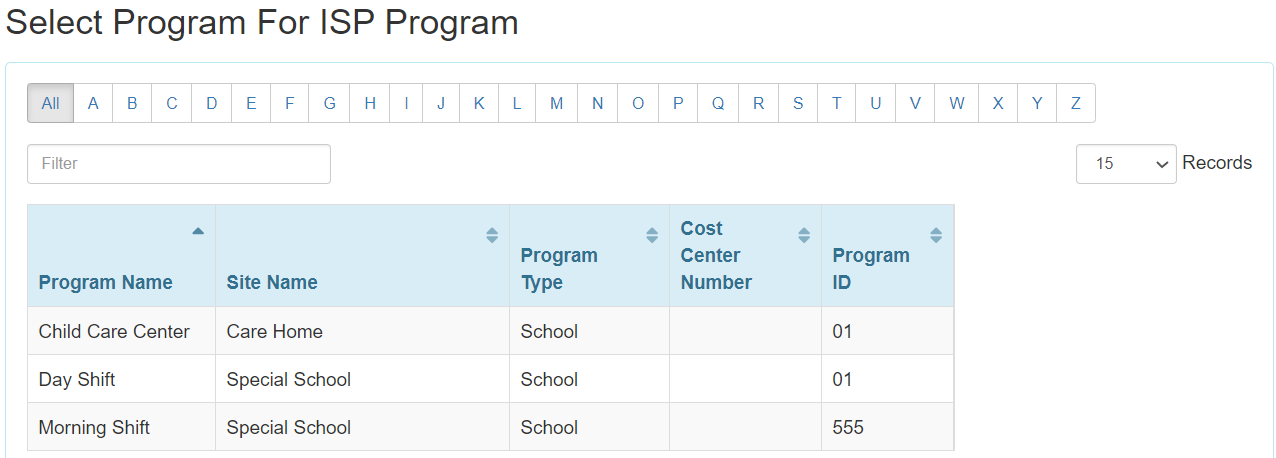
2. Select the Program that the individual is in from the list.
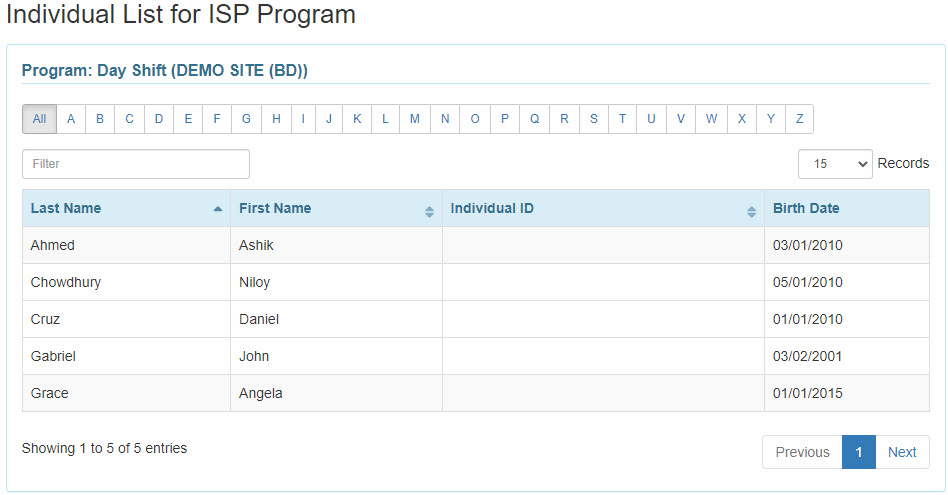
3. Select the Individual’s name from the list.
4. In the ISP Program form, enter required details for each section:
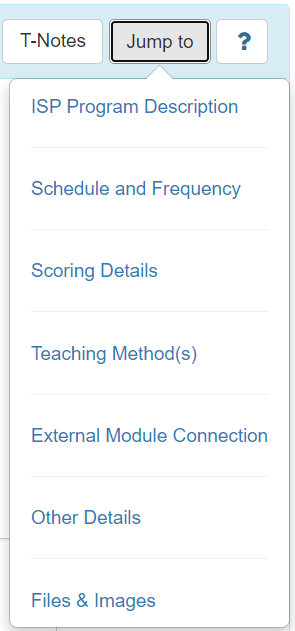
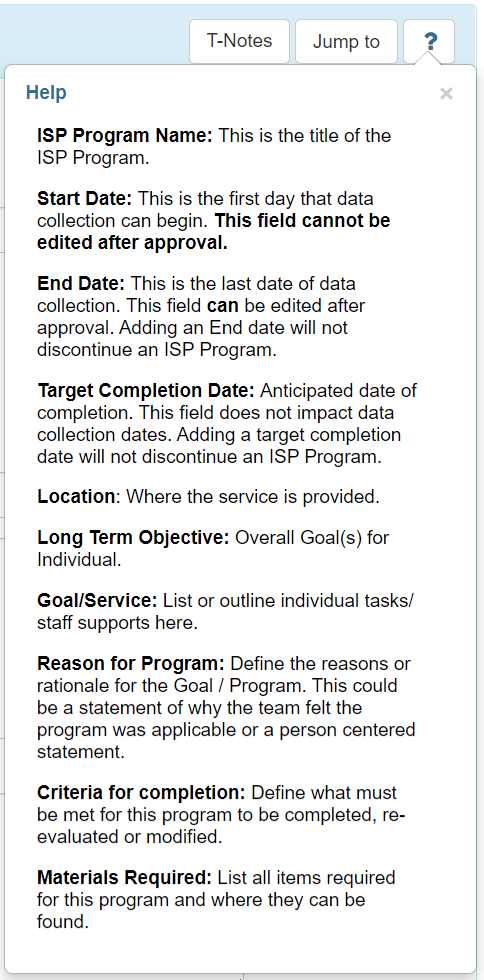
In the ISP Program form on the top right side there is a Jump to button. Clicking on the Jump to button will show the list of sections of the ISP Program. Users can click on an item from the list to go to that section.
A help button indicated by a question mark (?) is available. Clicking on this button will show a list containing brief descriptions of the fields in that section of the ISP Program.
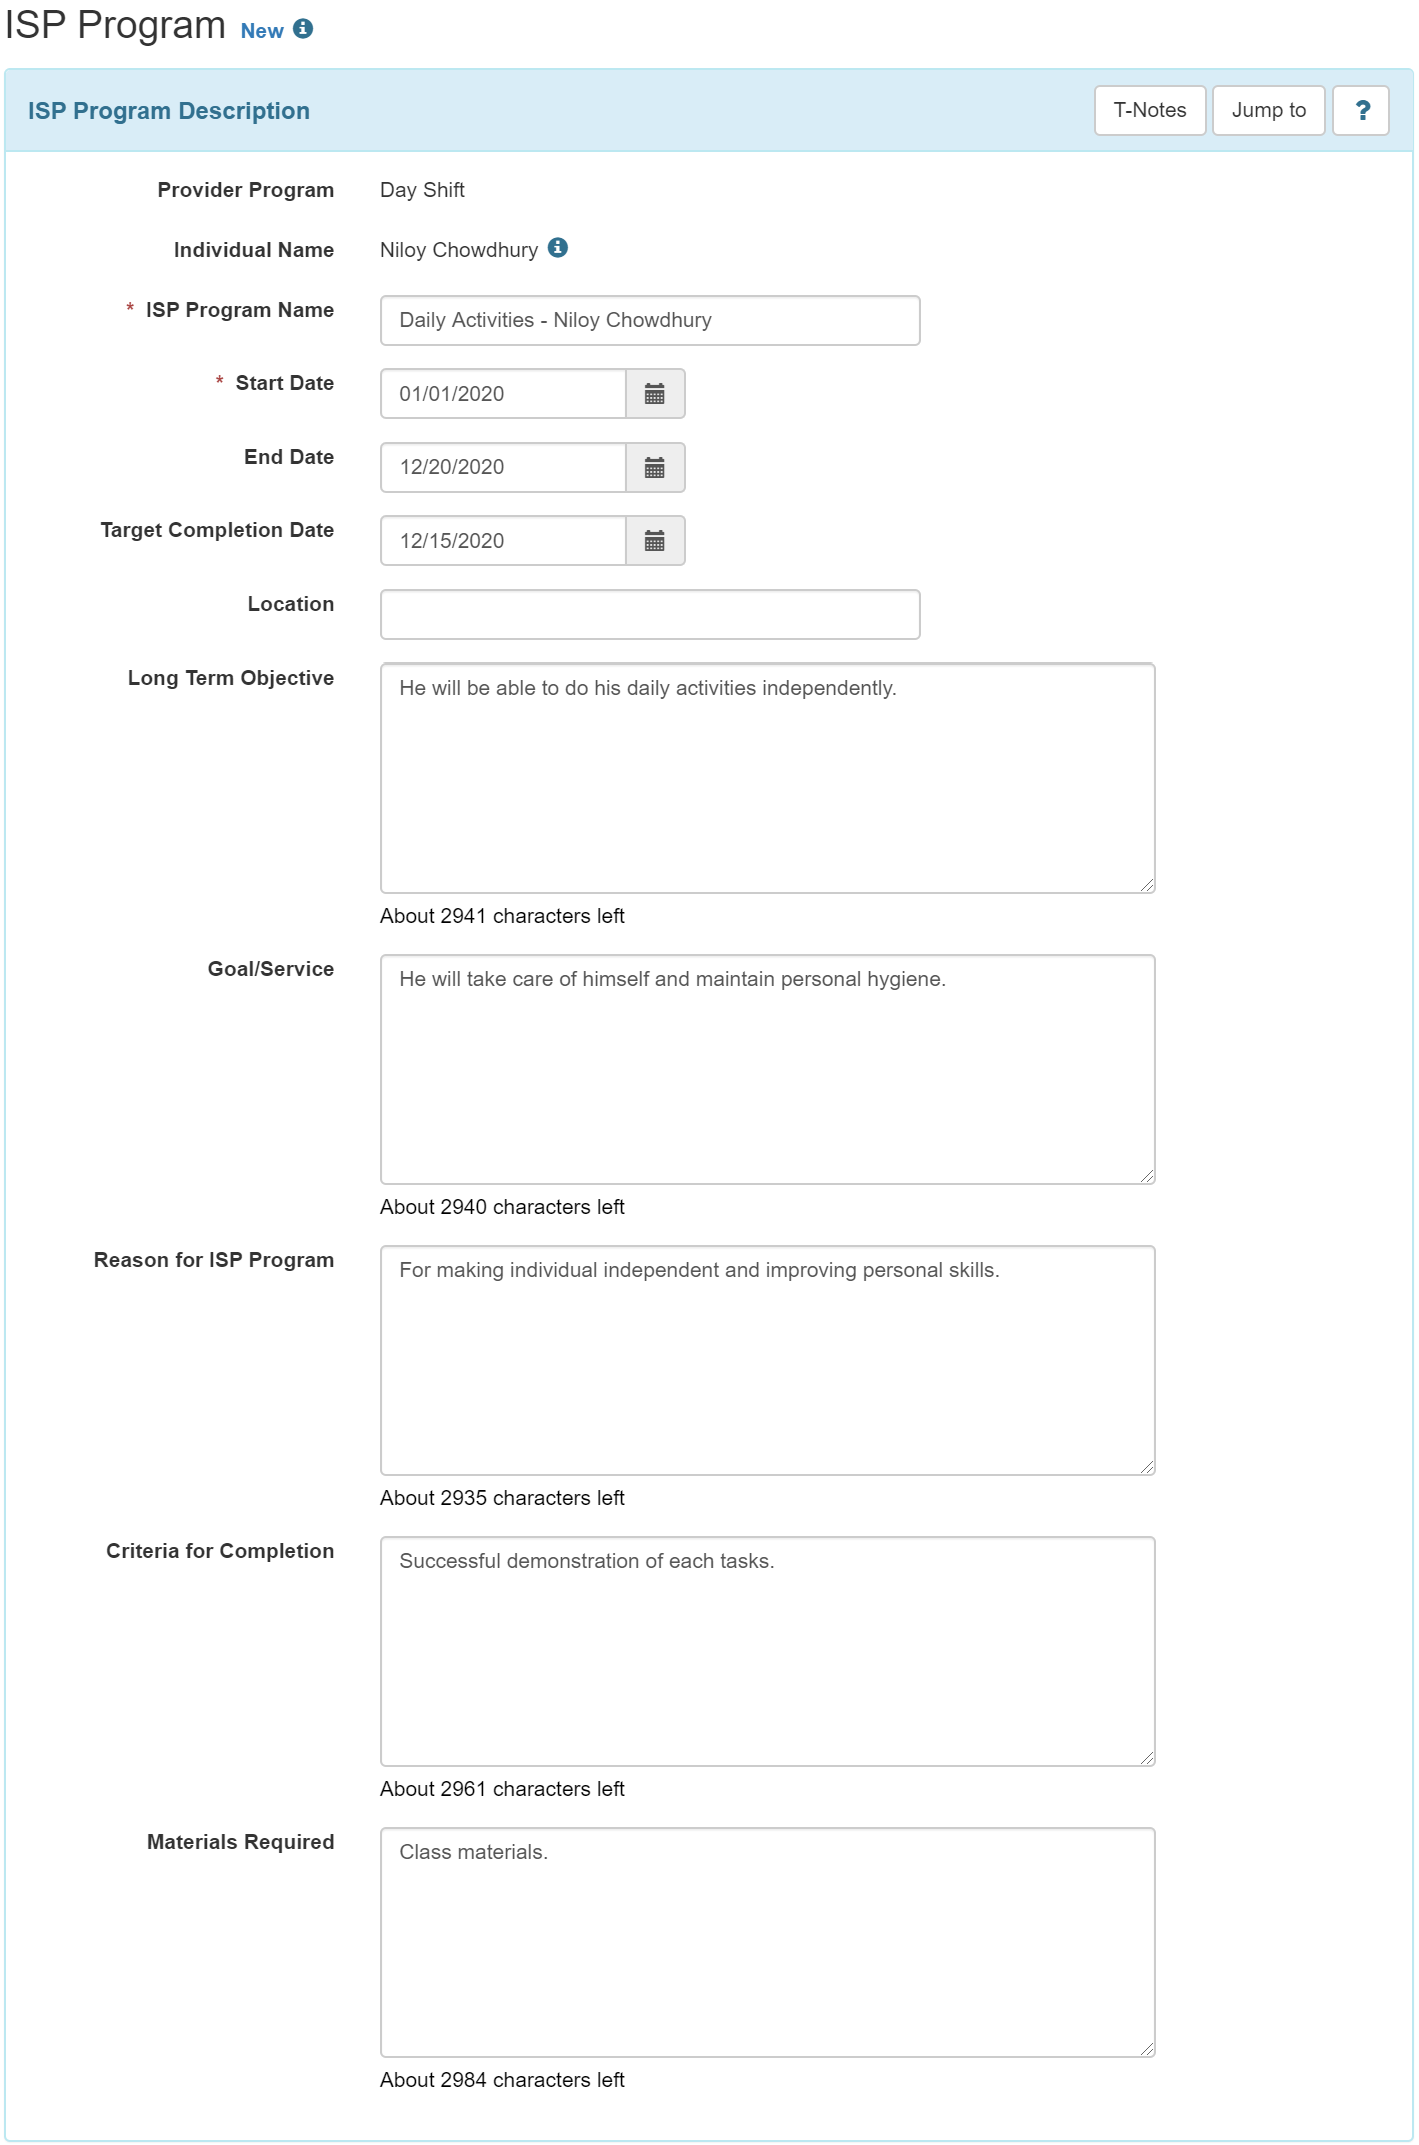
ISP Program Description
ISP Program Name: Enter the name of the objective, goal program, or task of this ISP program. Note: You cannot use the exact same ISP program name for the same individual more than once, so you may want to include a date, term name, or grade level.
Start Date: Data can be collected starting on the selected program creation date. You can use today’s date, or you can use a future date, such as the first of the following month, or the start of the next term, and the program will not be in effect to allow data collection until the selected date.
End Date: ISP Data cannot be submitted for a date later than the End Date. Adding an End Date will not automatically discontinue the ISP Program.
Schedule and Frequency
Frequency: Frequency indicates how often ISP data should be collected on this ISP program. You can select a number from 1 to 50 here and then you also need to select the appropriate option in the schedule field below.
When you click on the question mark in this section – it has “Frequency – Interval (1-50) in which data is expected.” and “Schedule – Unit (daily/weekly/monthly) in which data is expected.
Schedule: Schedule means when data is to be collected or the number of times it is expected. This is the number of times the ISP programs will be applied to an Individual. In this field a dropdown list is added containing three (3) options: Daily, Weekly, Monthly. This field will be required if a Frequency is selected.
If options are selected in the Frequency and Schedule fields, then they cannot be edited after approving the ISP Program.
Maximum Number of Times a Day: Enter how many times you want to allow documentation to be entered, at the most, per day, on this ISP program.
Fields marked with red asterisks are mandatory.

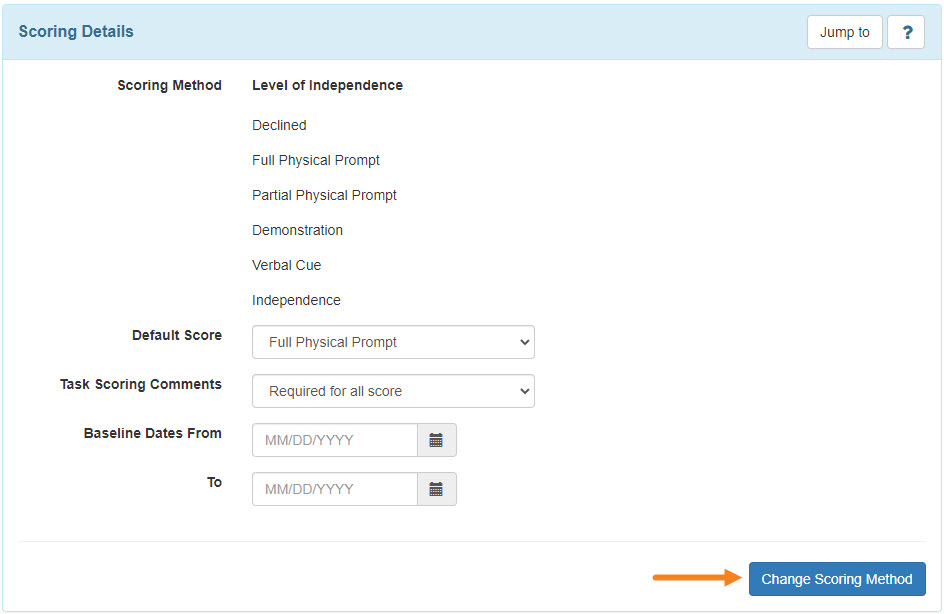
5. Next, click on the Add Scoring Method button from the right side under the Scoring Details section.

6. Select the desired scoring method from the list of available options in the ISP Program Scoring Method page. Once you are done selecting the Scoring Method, click on the Continue button.
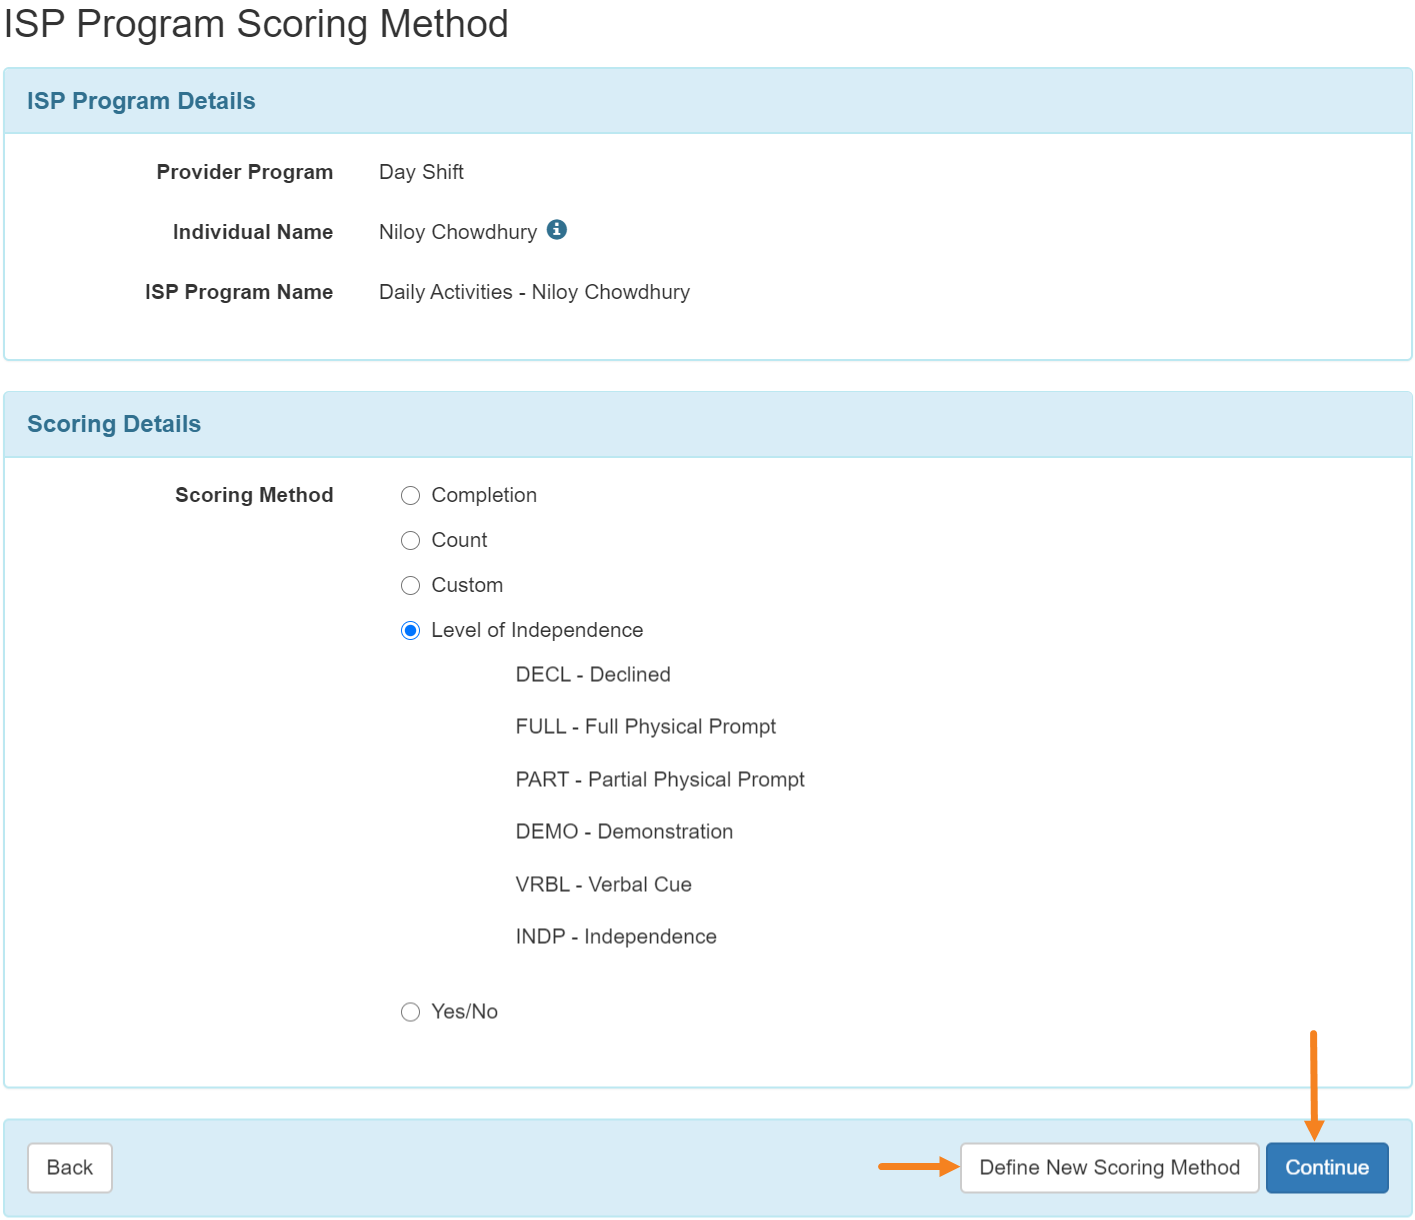
Note: If you do not see a scoring method that suits your needs, you may create a new scoring method.
Users assigned with the Scoring Method administrative role will be able to define new scoring methods by clicking on the Define New Scoring Method button at the bottom of the page.
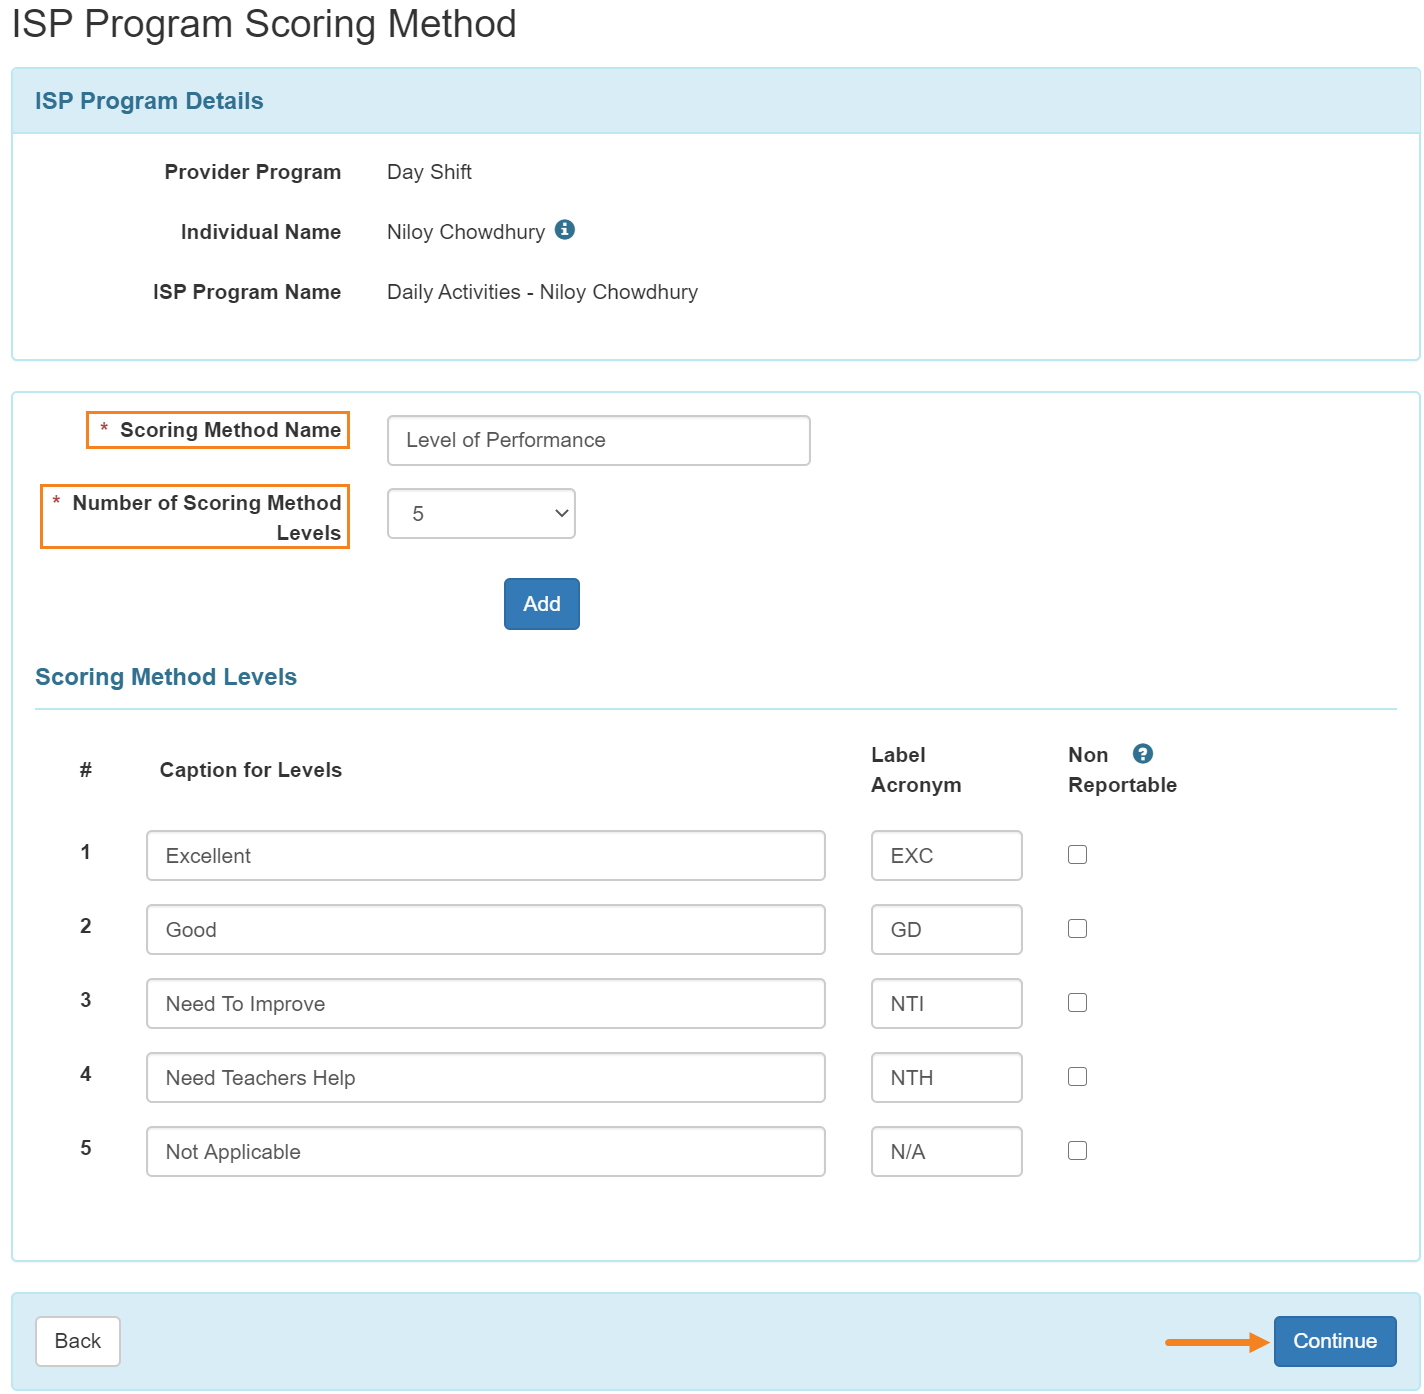
Note: There are 2 ways to create a scoring method – from here – for just this ISP program, or from the Admin tab, if you want to have the scoring method appear on the list of scoring method options.
Enter the Scoring Method Name and the Number of Scoring Method Levels you are going to add. The selected number of scoring method levels will become editable. Enter the Caption Name and Label Acronym for each label. The Label Acronym will appear in different ISP data reports. Select the checkbox in the Non Reportable column if you want to make a score level non-reportable. Non-Reportable scores can be recorded on ISP Data but will be excluded from calculations in the ISP Data Programmatic Report, which displays the percentage of progress on goals. Once you are done, click on the Continue button to return back to the main form.
The Edit Scoring Method button displayed after creating a new scoring method. Users can change the scoring method by clicking on the Edit Scoring Method Button.
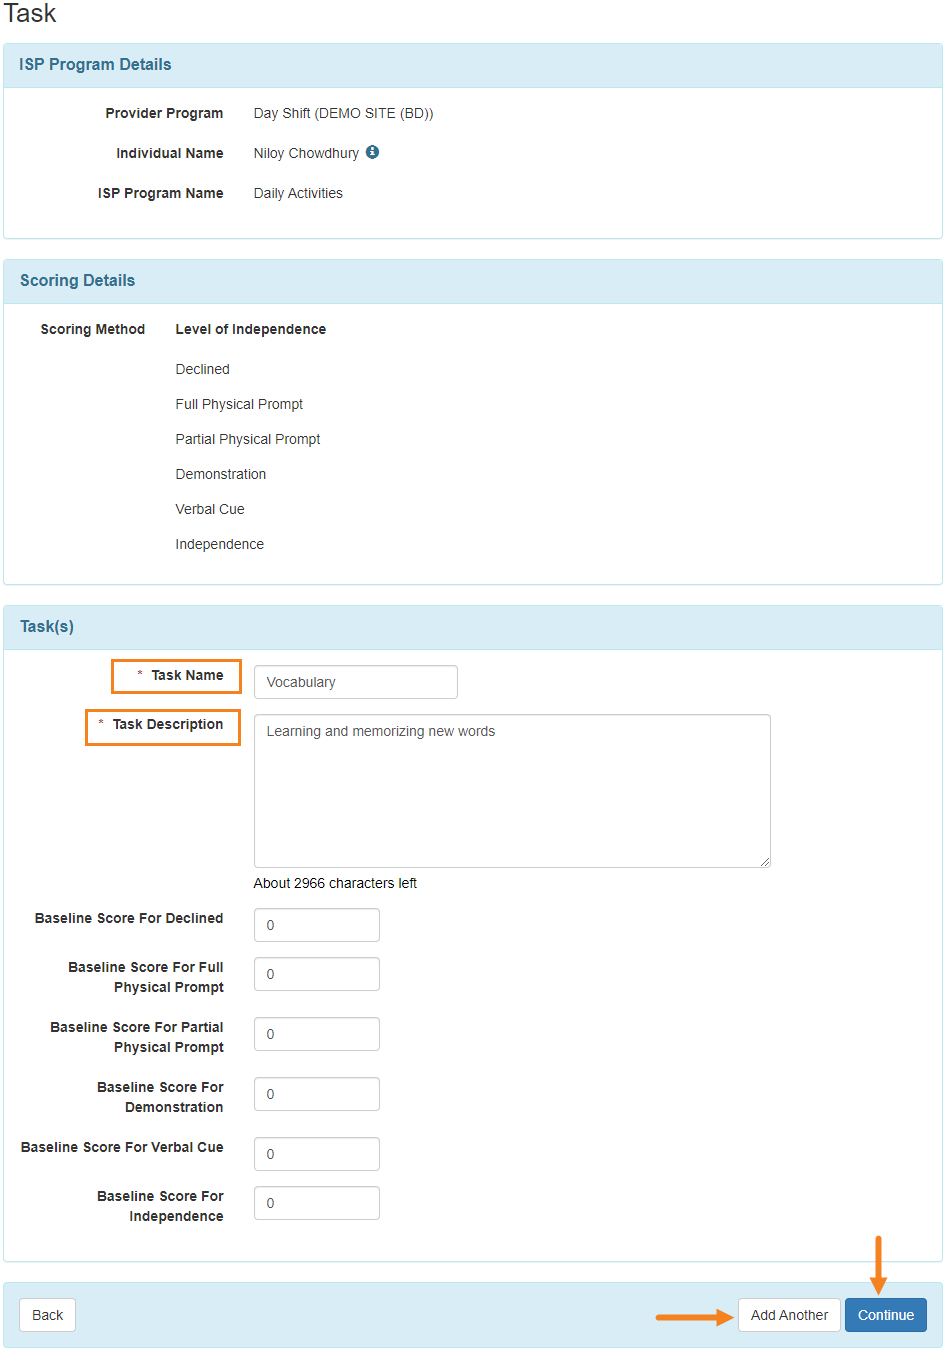
7. The Task(s) section will be available once a scoring method is selected. Click on the Add button to add a task.
Note: Users will be able to add a maximum of 60 tasks to an ISP Program.

8. Enter task details in the Task page. Add multiple Tasks by clicking on the Add Another button. After entering the last task, click on the Continue button.
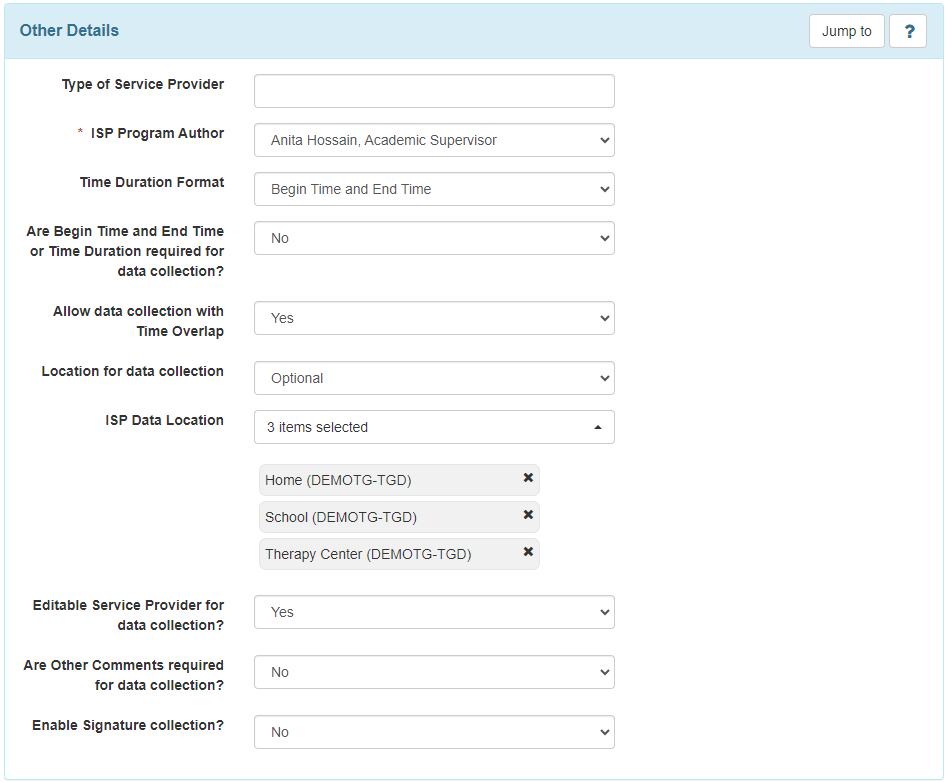
9. Fill in the Other Details section according to documentation needs and preferences.
For the ISP Data Location dropdown field to show, an option other than “None” must be selected in the field. If any option other than ‘Optional’ or ‘None’ is selected in the Location for data collection field, then the user must select an option from the ISP Data Location field.
Options can be adjusted later when the template is applied to the Individual.
10. In the Files & Images section, users can add files and images.
- To add a file, click on Add File
- To add an image, click on the Add Image button
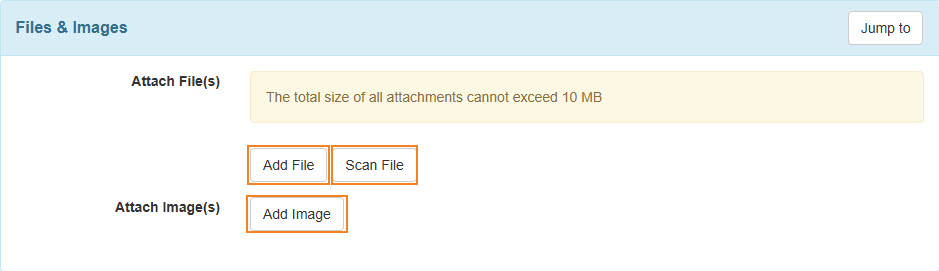
Note: The maximum size for images and files can be 3 megabytes.
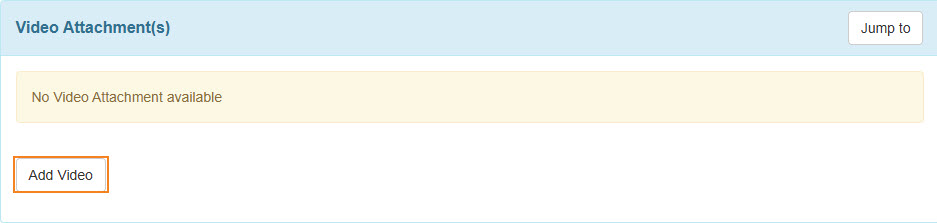
11. Therap users who have the Video Upload super role will be able to see the video option. To obtain the necessary privileges, users can contact their agency’s Provider Admin.
- Click on the Add Video button in the Video Attachment(s) section.
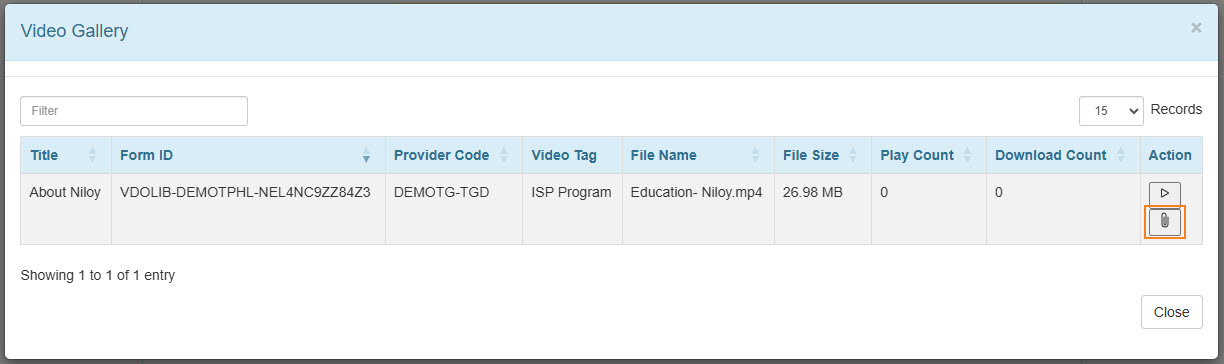
Note: To add this video for an individual, the video must be present in the ISP Program Form Tag in the Video Library.
- Click on the pin icon to add the video.
12. Once done with entering the necessary information, click on the Save, Submit, or Approve button at the bottom of the ISP Program.
- Click on the Save button to edit the ISP Program later. Note: Click on Search beside the ISP Program row from the Individual tab to find the Saved ISP Program. You can also find saved ISP programs on your To Do Tab worklist.
- Click on the Submit if all the fields are filled up and you are ready for this to be reviewed and approved.
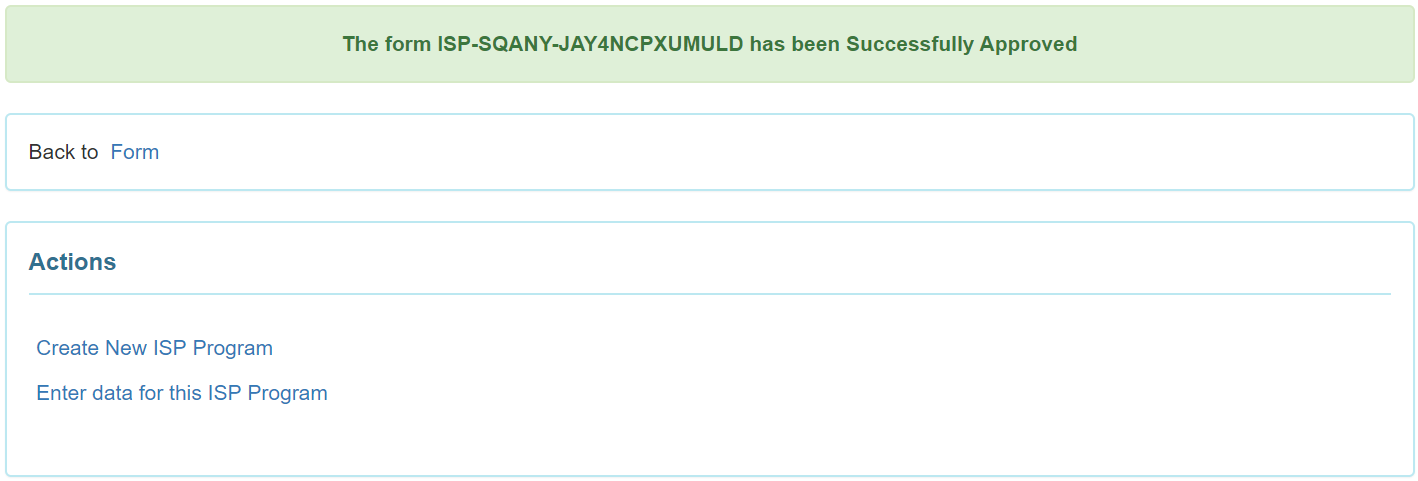
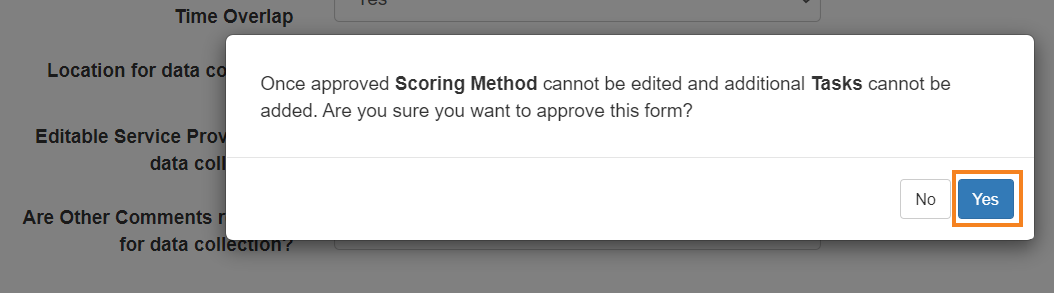
- Click on the Approve button if you are an Admin and all the sections of the ISP Program are completed as needed.

Note: A warning message will be displayed after clicking on the Approve button of an ISP Program, stating that once approved, Scoring Method cannot be edited and additional Tasks cannot be added. Users will need to click on the Yes button to approve the ISP Program.
After making your choice, if you have completed all required fields, a success message will be displayed.
If you do not get a success message, look back to find any needed information, complete that, and try again.