Create New GER Resolution
Users with the GER Resolution Edit role can create new resolutions on a GER.
1. Click on the New link or the Unaddressed GERs link beside the GER Resolution option on the Individual tab.
(Note: GERs approved in the last 30 days will be shown. For GERs approved more than 30 days ago, you would need to search for the GER in the General Event Reports (GER) row and then use the Create a new GER Resolution link next to GER Resolution under the Basic Information Section.)

2. On the GER Select page, select the GER form and click on the Next button.

3. GER Resolution form will be opened. Under the GER Information section all the information will be auto populated from the GER form.

- Upon clicking on the GER Form ID, users will be able to see the Approved GER form on a pop up window.
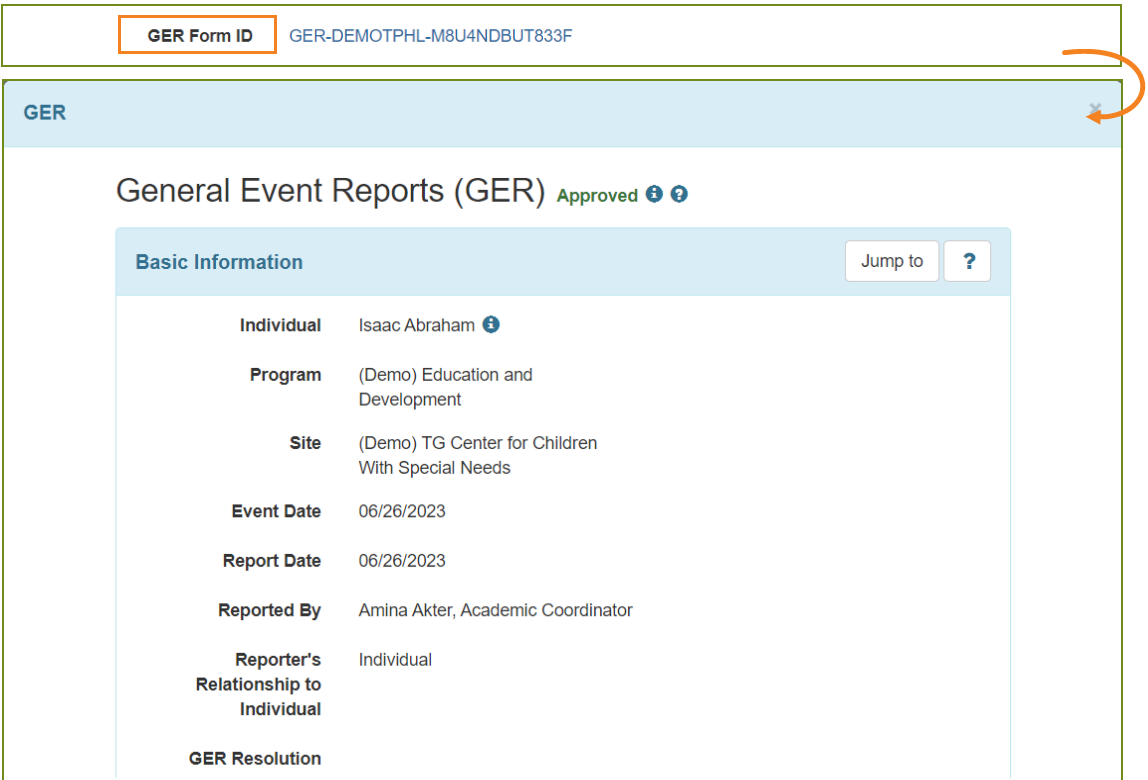
4. Under the General Information section, the Date Opened field will be auto populated. Users can change the date by clicking on the Calendar icon.
- Users can select ‘Yes’ or ‘No’ for ‘Was this a critical event? And ‘Is an investigation needed?’ fields.
- Users can select Abuse/Neglect/Exploitation Types from the drop-down list if needed.

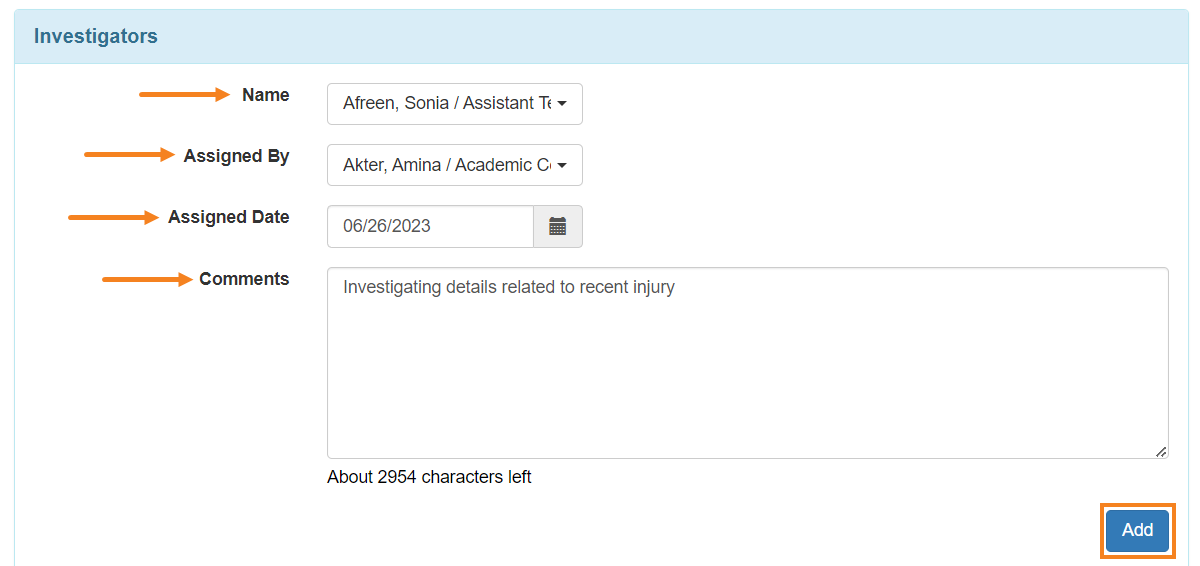
5. Under the Investigators section, users can select the Name of the investigator, select the Assigned By name, and enter the Assigned Date and add comments if needed. Click on the Add button to save any changes. Users can add additional investigators in this section by repeating this process if necessary.

6. Under the Investigators’ Narratives section, select the Action Type, add necessary comments and click on the Add button. The added comment will be shown below in this section.


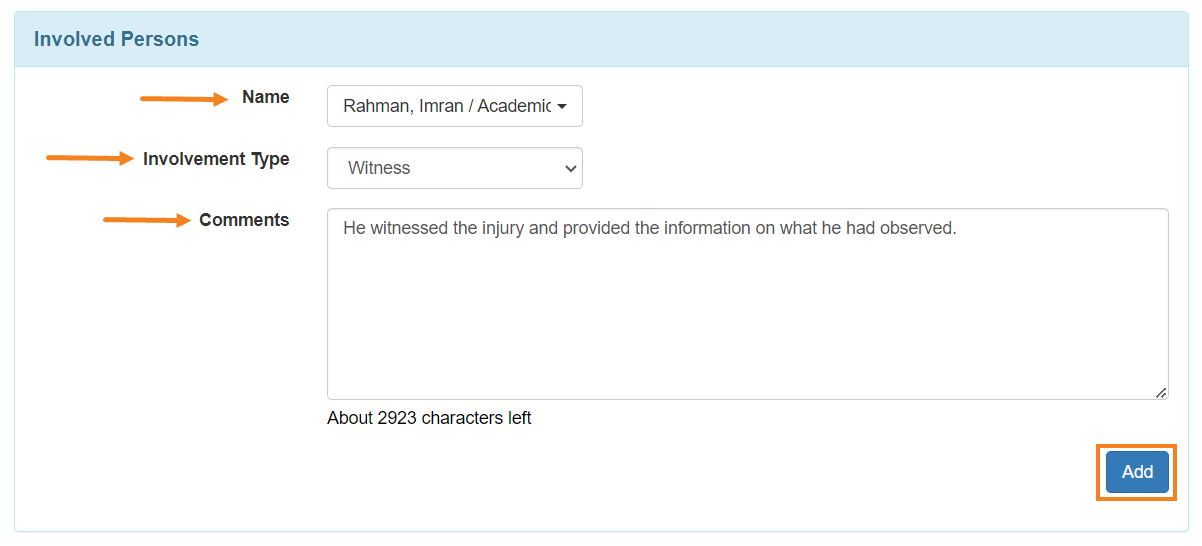
7. Under the Involved Persons section, users may select the Name, Involvement Type and click on the Add button to add comments in the Comments field.
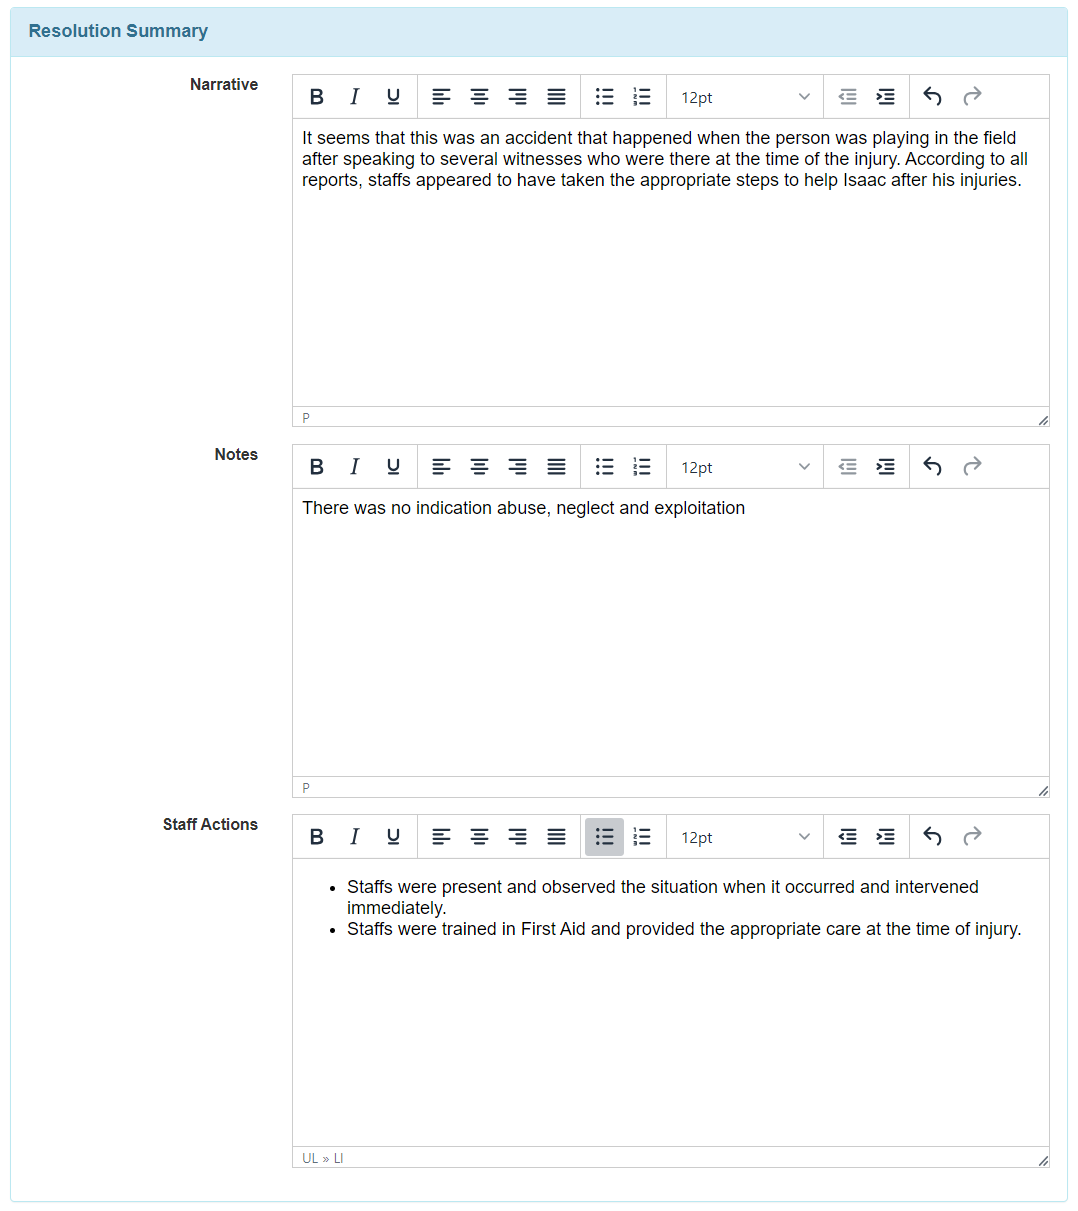
8. Under the Resolution Summary section, users can add detailed information about the incident in the Narratives, Notes, Staff Actions field.
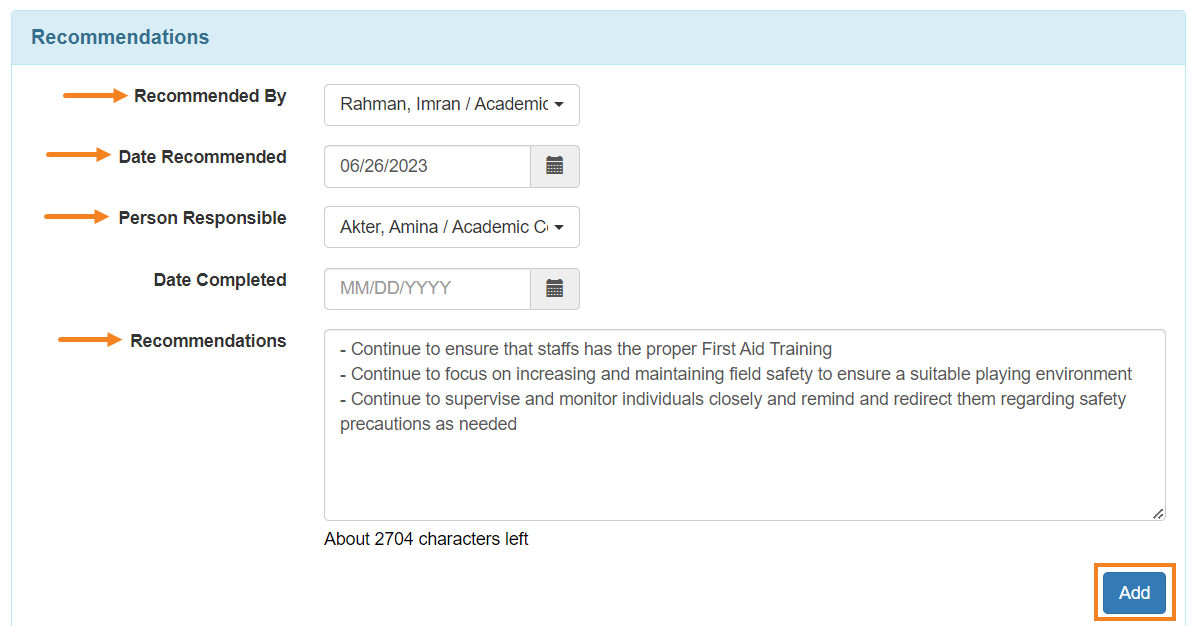
9. Under the Recommendations section, users can enter recommendations and click on the Add button.
- Users can click on the check icon or remove icon to change the status to Complete or Delete the recommendations.

10. Users can add or scan files of the incident under the Supporting Documents section by clicking on the Add File or Scan File option and add comments in the Comments field by clicking on the Add button.

11. After filling up all the necessary fields, click on the Save button to save the form.

- A success message will be displayed.


