Appointments Calendar
To keep track of upcoming appointments, users may use the Appointments Calendar which will appear in a calendar format.
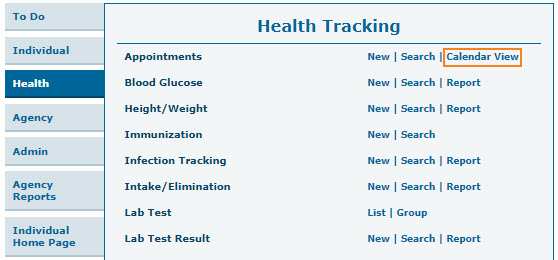
1. Click on the Calendar View link beside the Appointments option on the Health tab.
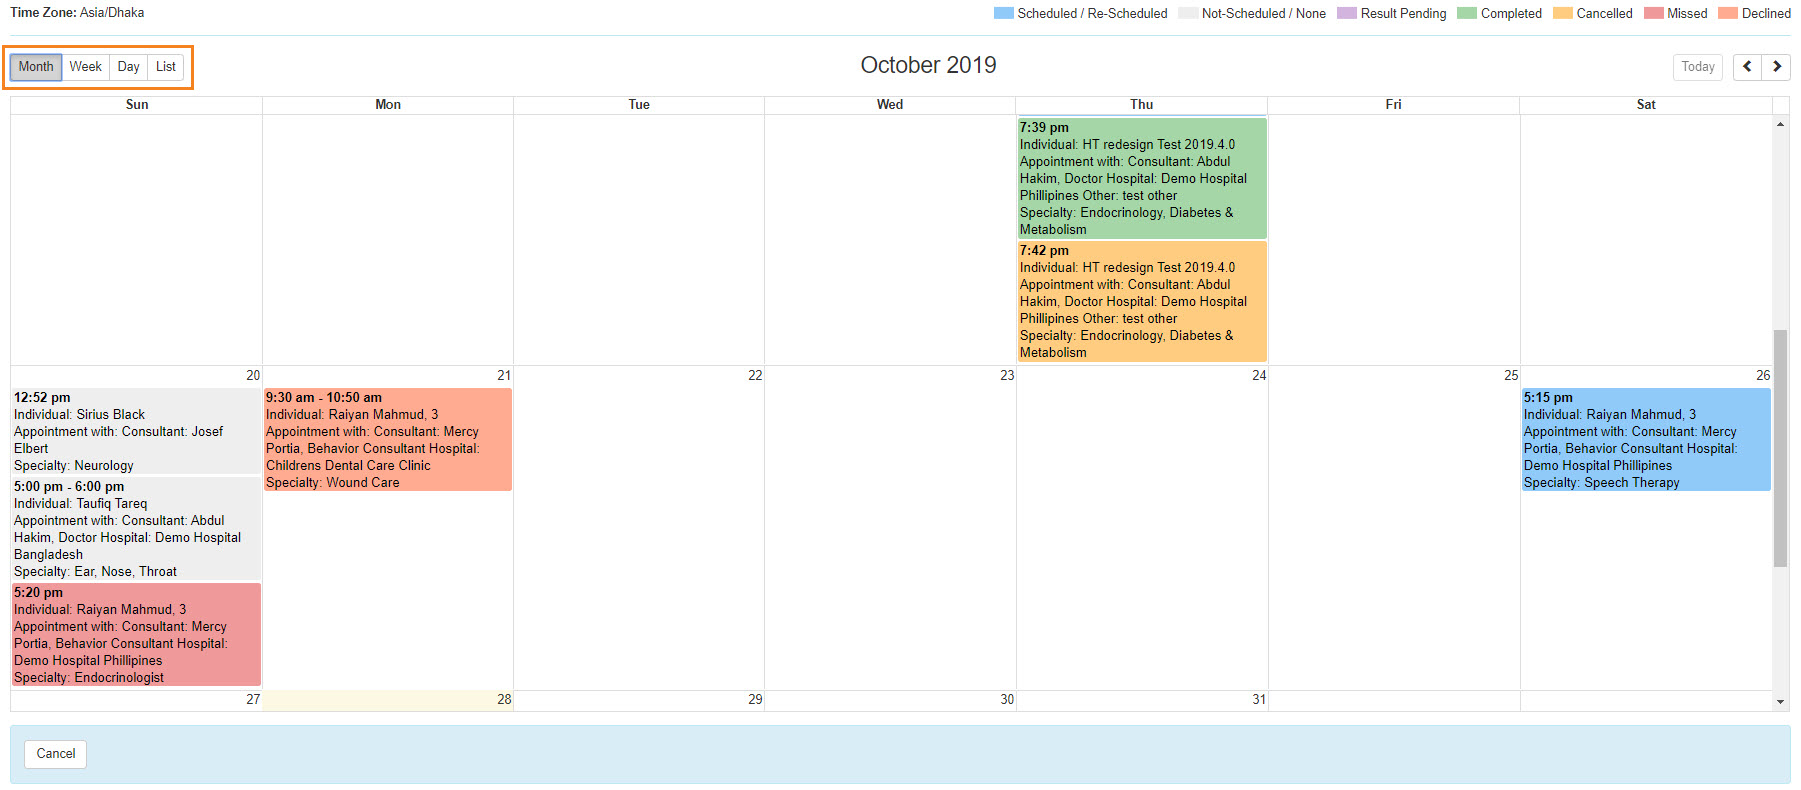
2. Scheduled appointments for individuals will appear in a calendar format. Users can view Appointments in 3 different calendar modes: Month, Week, and Day.
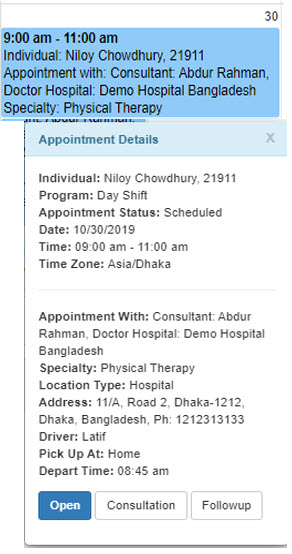
3. By clicking on the Quick Note (scheduled appointment box), a pop-up Appointment Details box will appear with the following information: Individual Name, Program Name, Appointment on, Appointment With, Appointment Type.
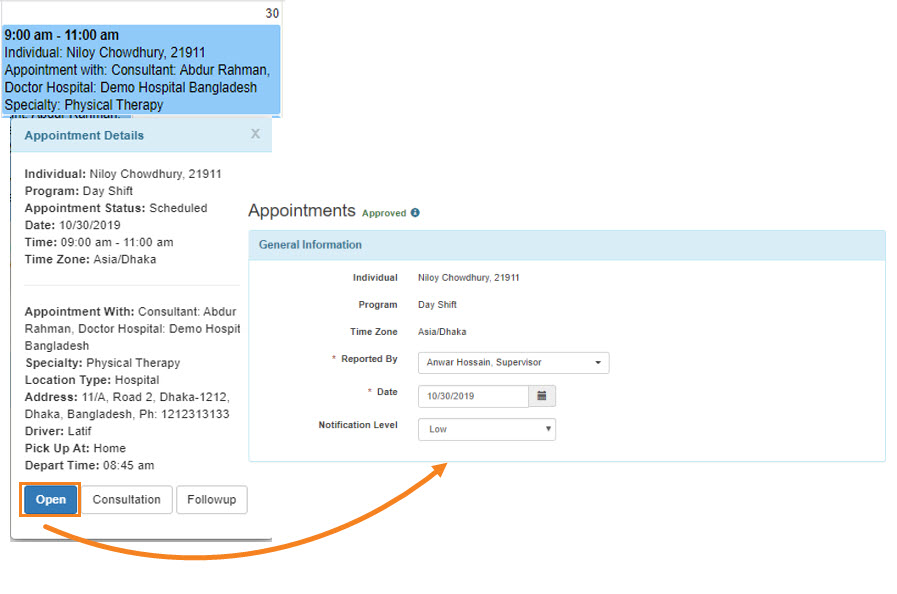
4. Users can view the Appointment form by clicking on the Open button from the Appointment Details box.
5. Users can add appointment results. Select Add Result

Select the needed choice from the dropdown and add a description if needed


Click on the Submit button if all the necessary information has been added.
6. Users can view the Consultation Form by clicking on the Consultation button.
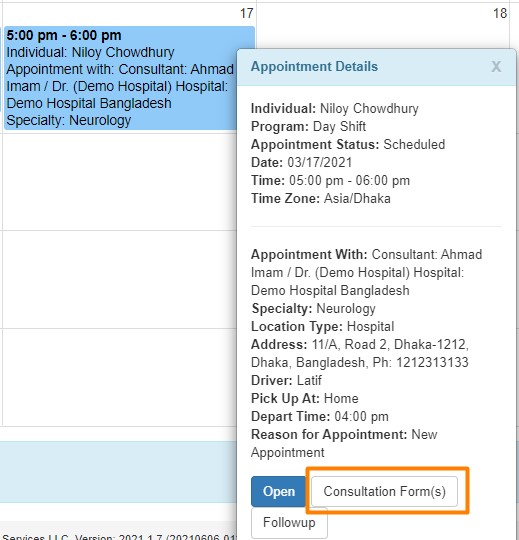
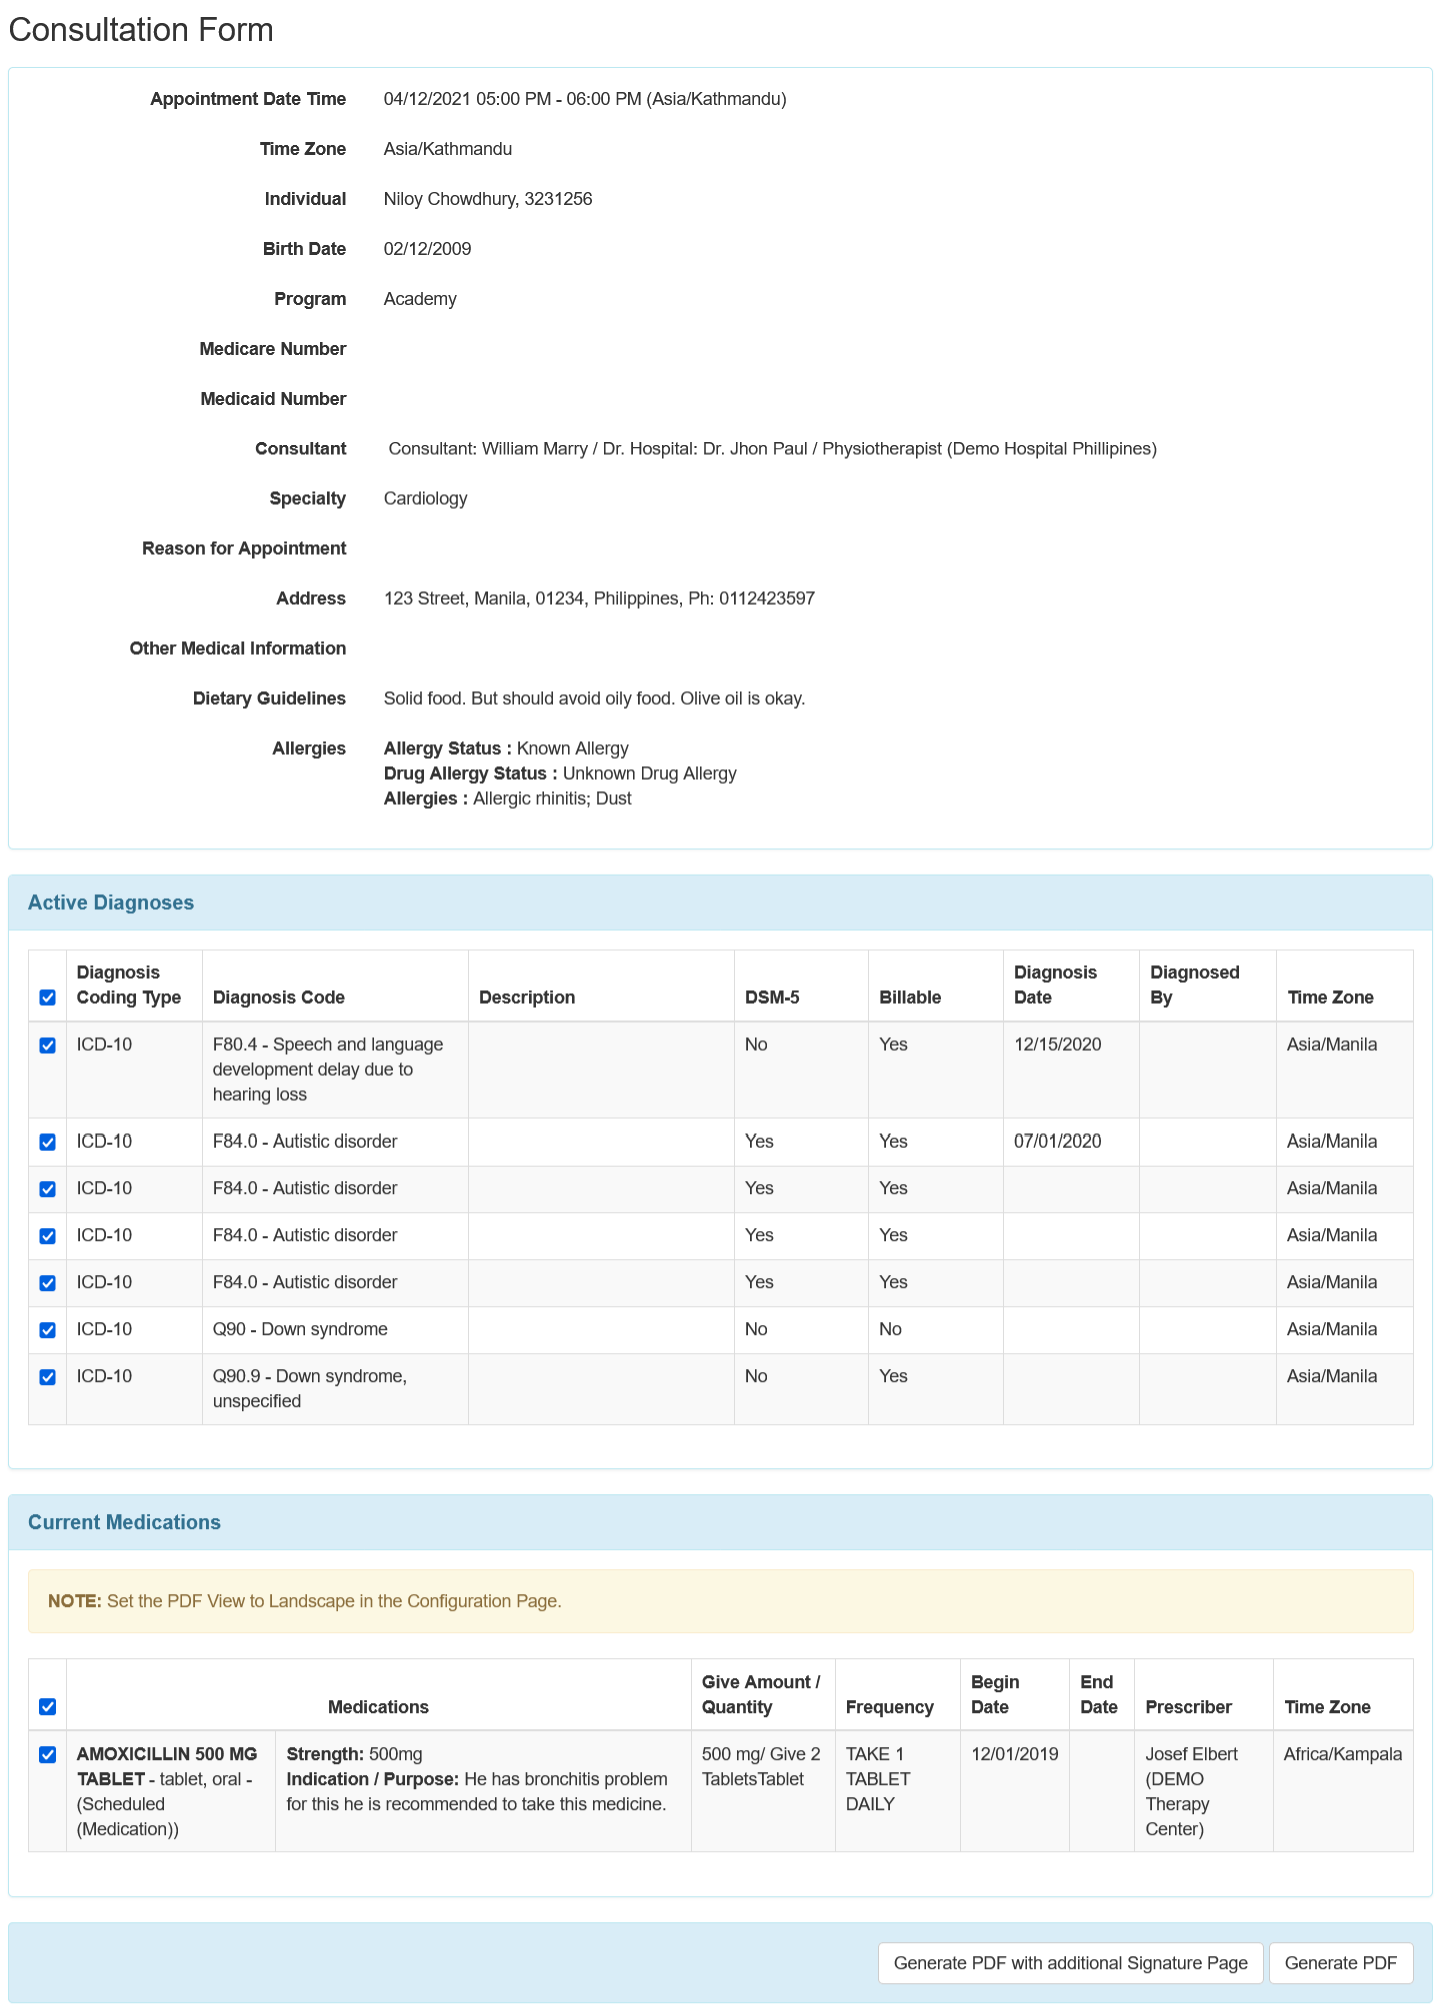
The completed Consultation form can be download by clicking on the Generate PDF button.
7. Users can add followup by clicking on the Followup button from the pop-up Appointment Details box. Enter all the necessary information (Appointment Date, Notification Level, Time) for the Individual to add follow up in the Appointment page.
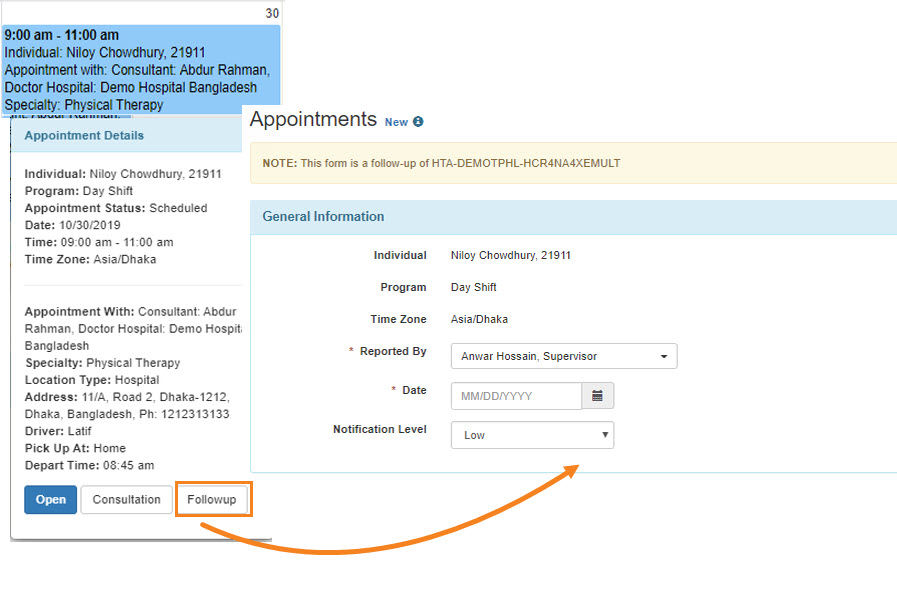
Click on the Submit button to submit the form. If you want to send this form to your colleagues (Therap users), click on the SComm button.

To know more about the SComm module, click here.


