Record MAR Data
Users assigned with the MAR Data Submit role can record new Medication Administration Records (MARs). Users assigned with the MAR Data Update role can update existing MAR data in Detailed Mode.
1. Click on the Record Data link beside the Data option under the Health tab.

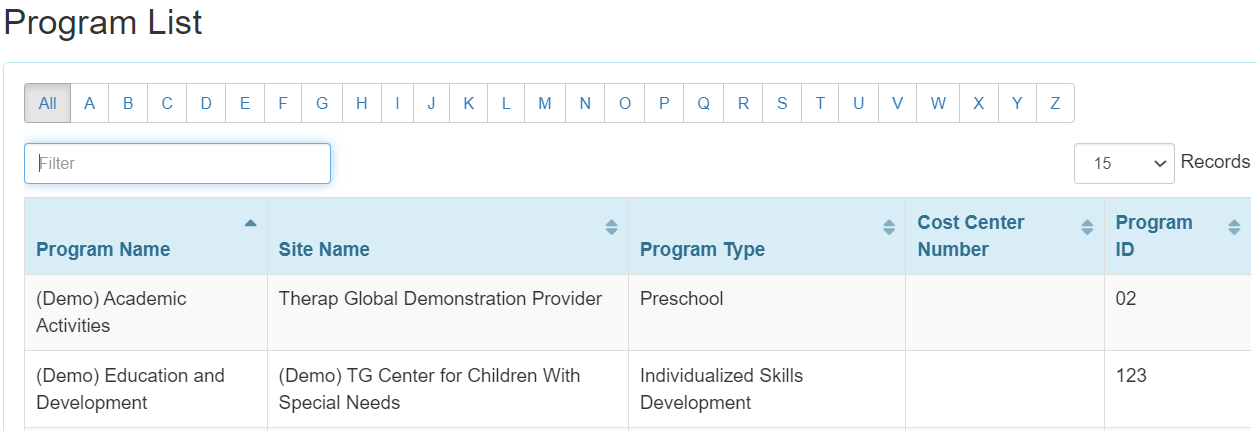
2. Select the appropriate program from the Program List page.
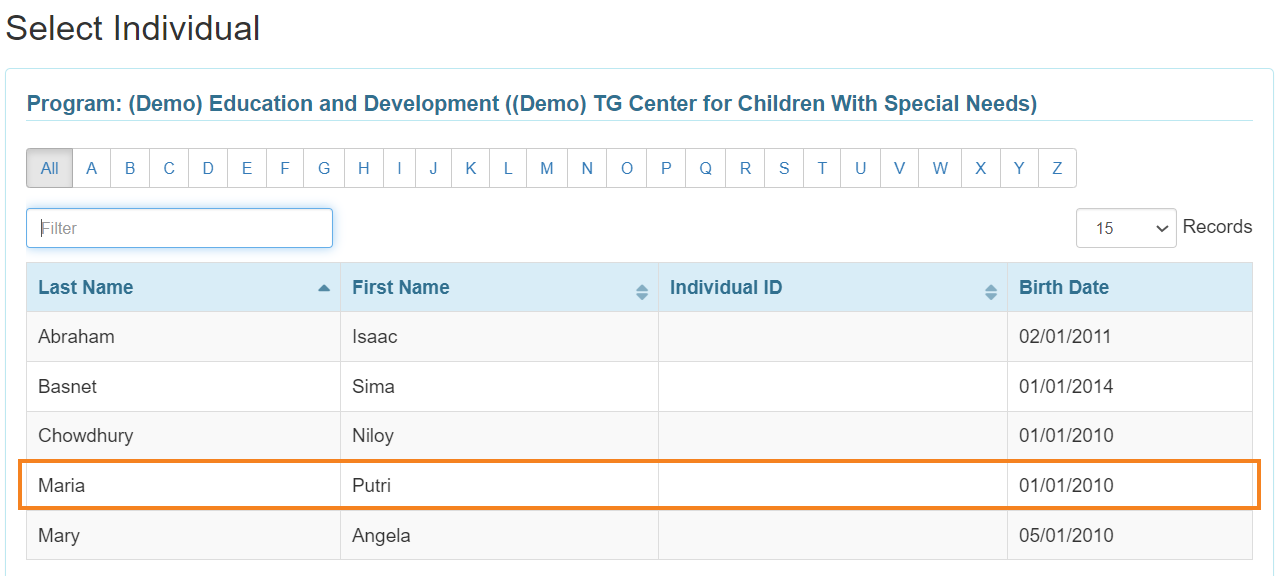
3. Select the Individual name from the Select Individual list page.
4. After you have selected the appropriate program and individual name from the lists, the Medication Administration Record Configuration page of that individual for that particular month will be displayed. Users then may either record data in Quick Mode or Detail Mode on the MAR.
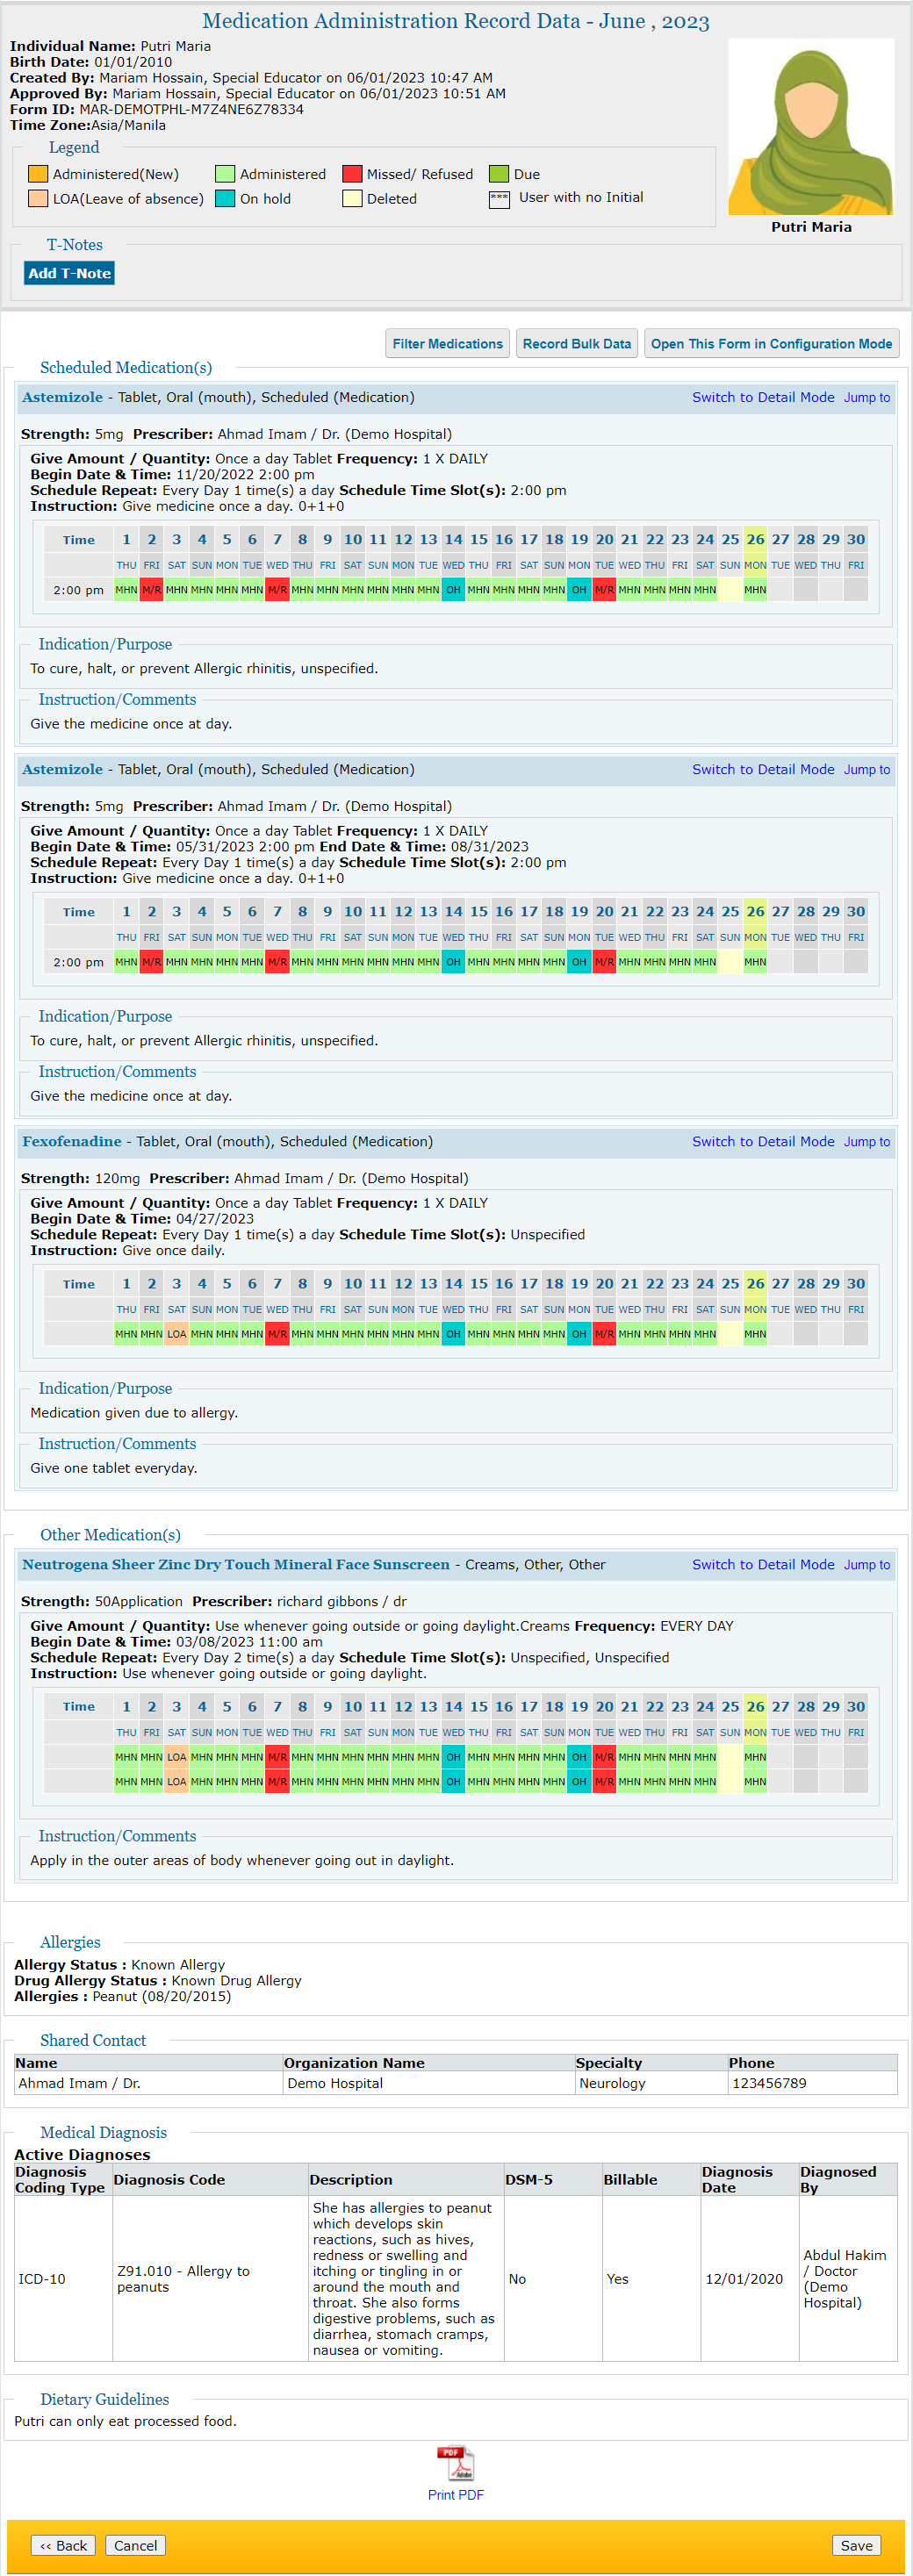
- The Due cells will be green when a medication or treatment is scheduled.
- In the Quick mode, the newly administered cell will display orange, while the Administered cell will appear light green.
- Missing/Refused cells will be displayed in red, while cells that are On hold will be displayed in blue.
- The Leave of absence (LOA) cells will display in a light pink tint, whereas cells that have been Deleted will display in a white color.
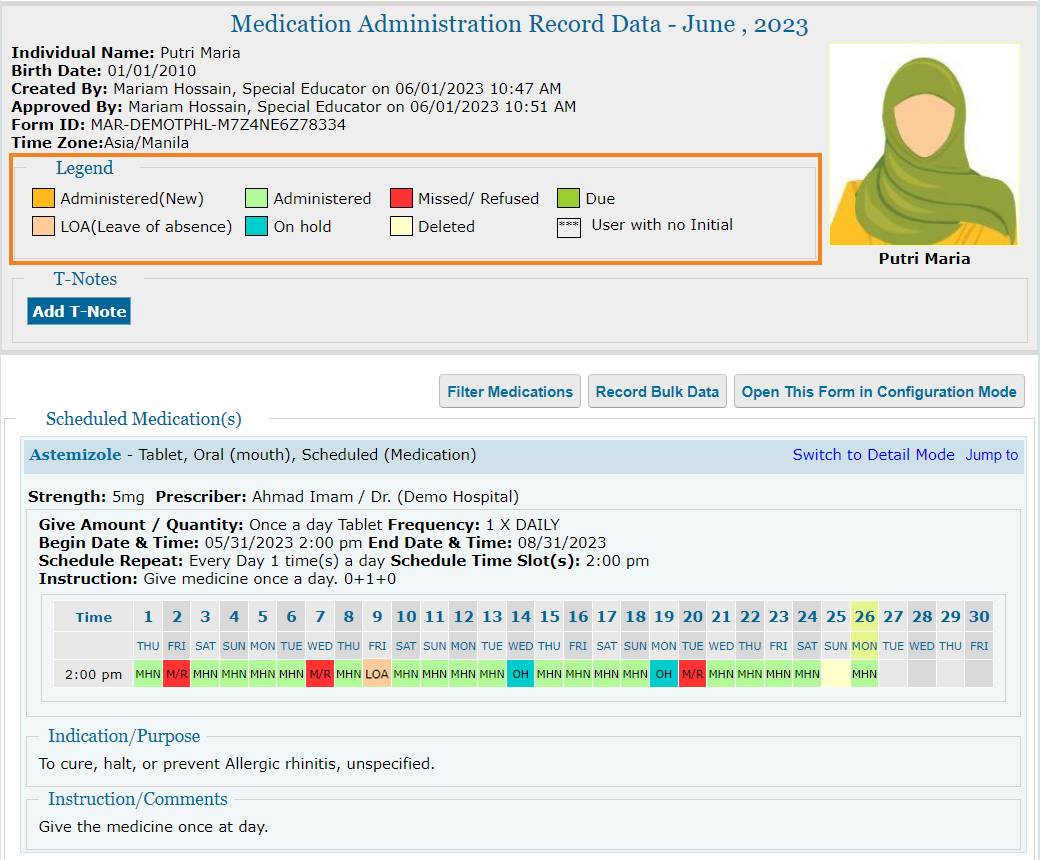
5. To switch to quick mode, click the Switch to Quick mode link. To enter data in Quick mode, click on the appropriate slot that corresponds to the relevant schedule time.
If a cell is clicked to enter data in Quick mode, then the Administer Time is automatically set as the Scheduled Time, and the name of the user entering the medication is set by default in the Administered By field.
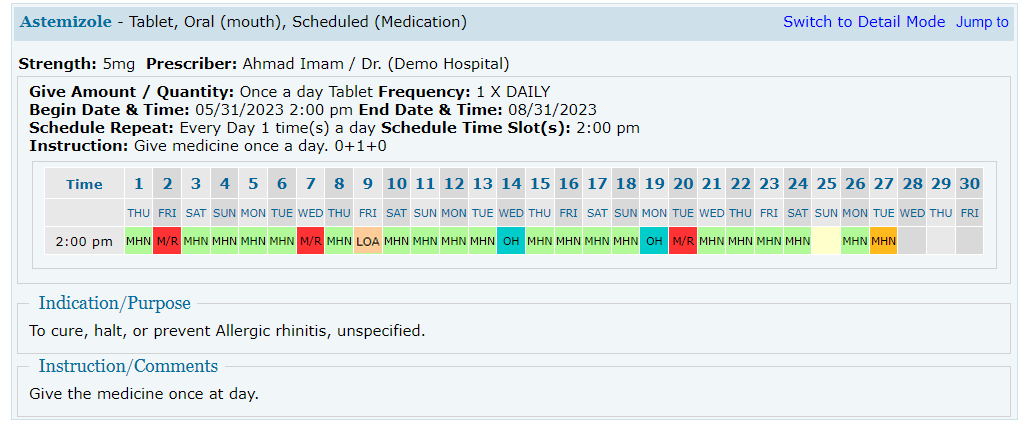
6. Users can access the Detail mode by clicking the Switch to Detail Mode link in the upper right corner of the MAR.
To enter data in Detail Mode, click on the appropriate cell that corresponds to the relevant schedule time. This will open the Detail Data pop up window. Record types can be entered as Missed, Refused, LOA, On Hold, Deleted and Administered. Other details such as Administer Date, Administer Time, Administered By, and Comments can be entered.
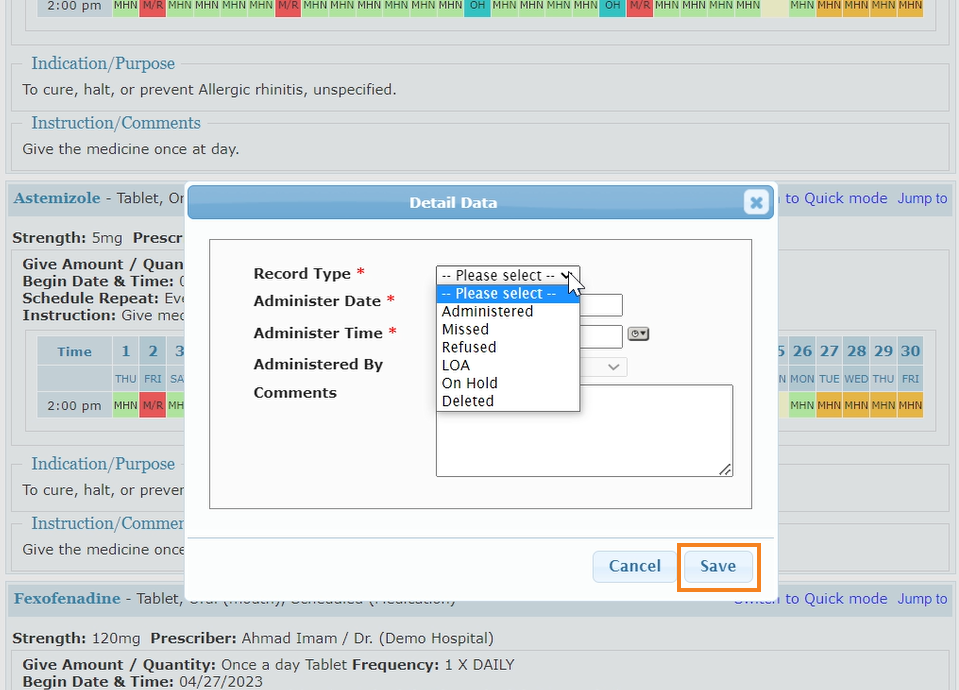
Clicking on the Save button will save the entry.
7. To submit the data, click the Save button at the bottom of the form. A success message will appear once the MAR data has been successfully submitted.


